

Faculty Equivalent Tested Experience Qualifications
The Faculty Credentials Processing form has been replaced with an Adobe Sign workflow, Faculty Equivalent Tested Experience Qualifications. This workflow handles the required routing and informs all parties when the process has been completed and the information has been uploaded to Banner.
Please send any questions or problems to accreditation@nmsu.edu.
View a flowchart of the process
Workflow Instructions
How to Submit a Form for Approval
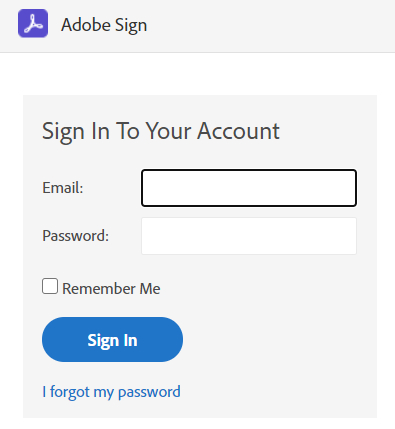
1. Sign into Adobe Sign
Sign in to Adobe Sign at https://secure.na2.echosign.com/public/login using your NMSU email address. No password is needed on Adobe Sign, but you may be prompted to log in through the MyNMSU portal.
2. Select "Start from Library"
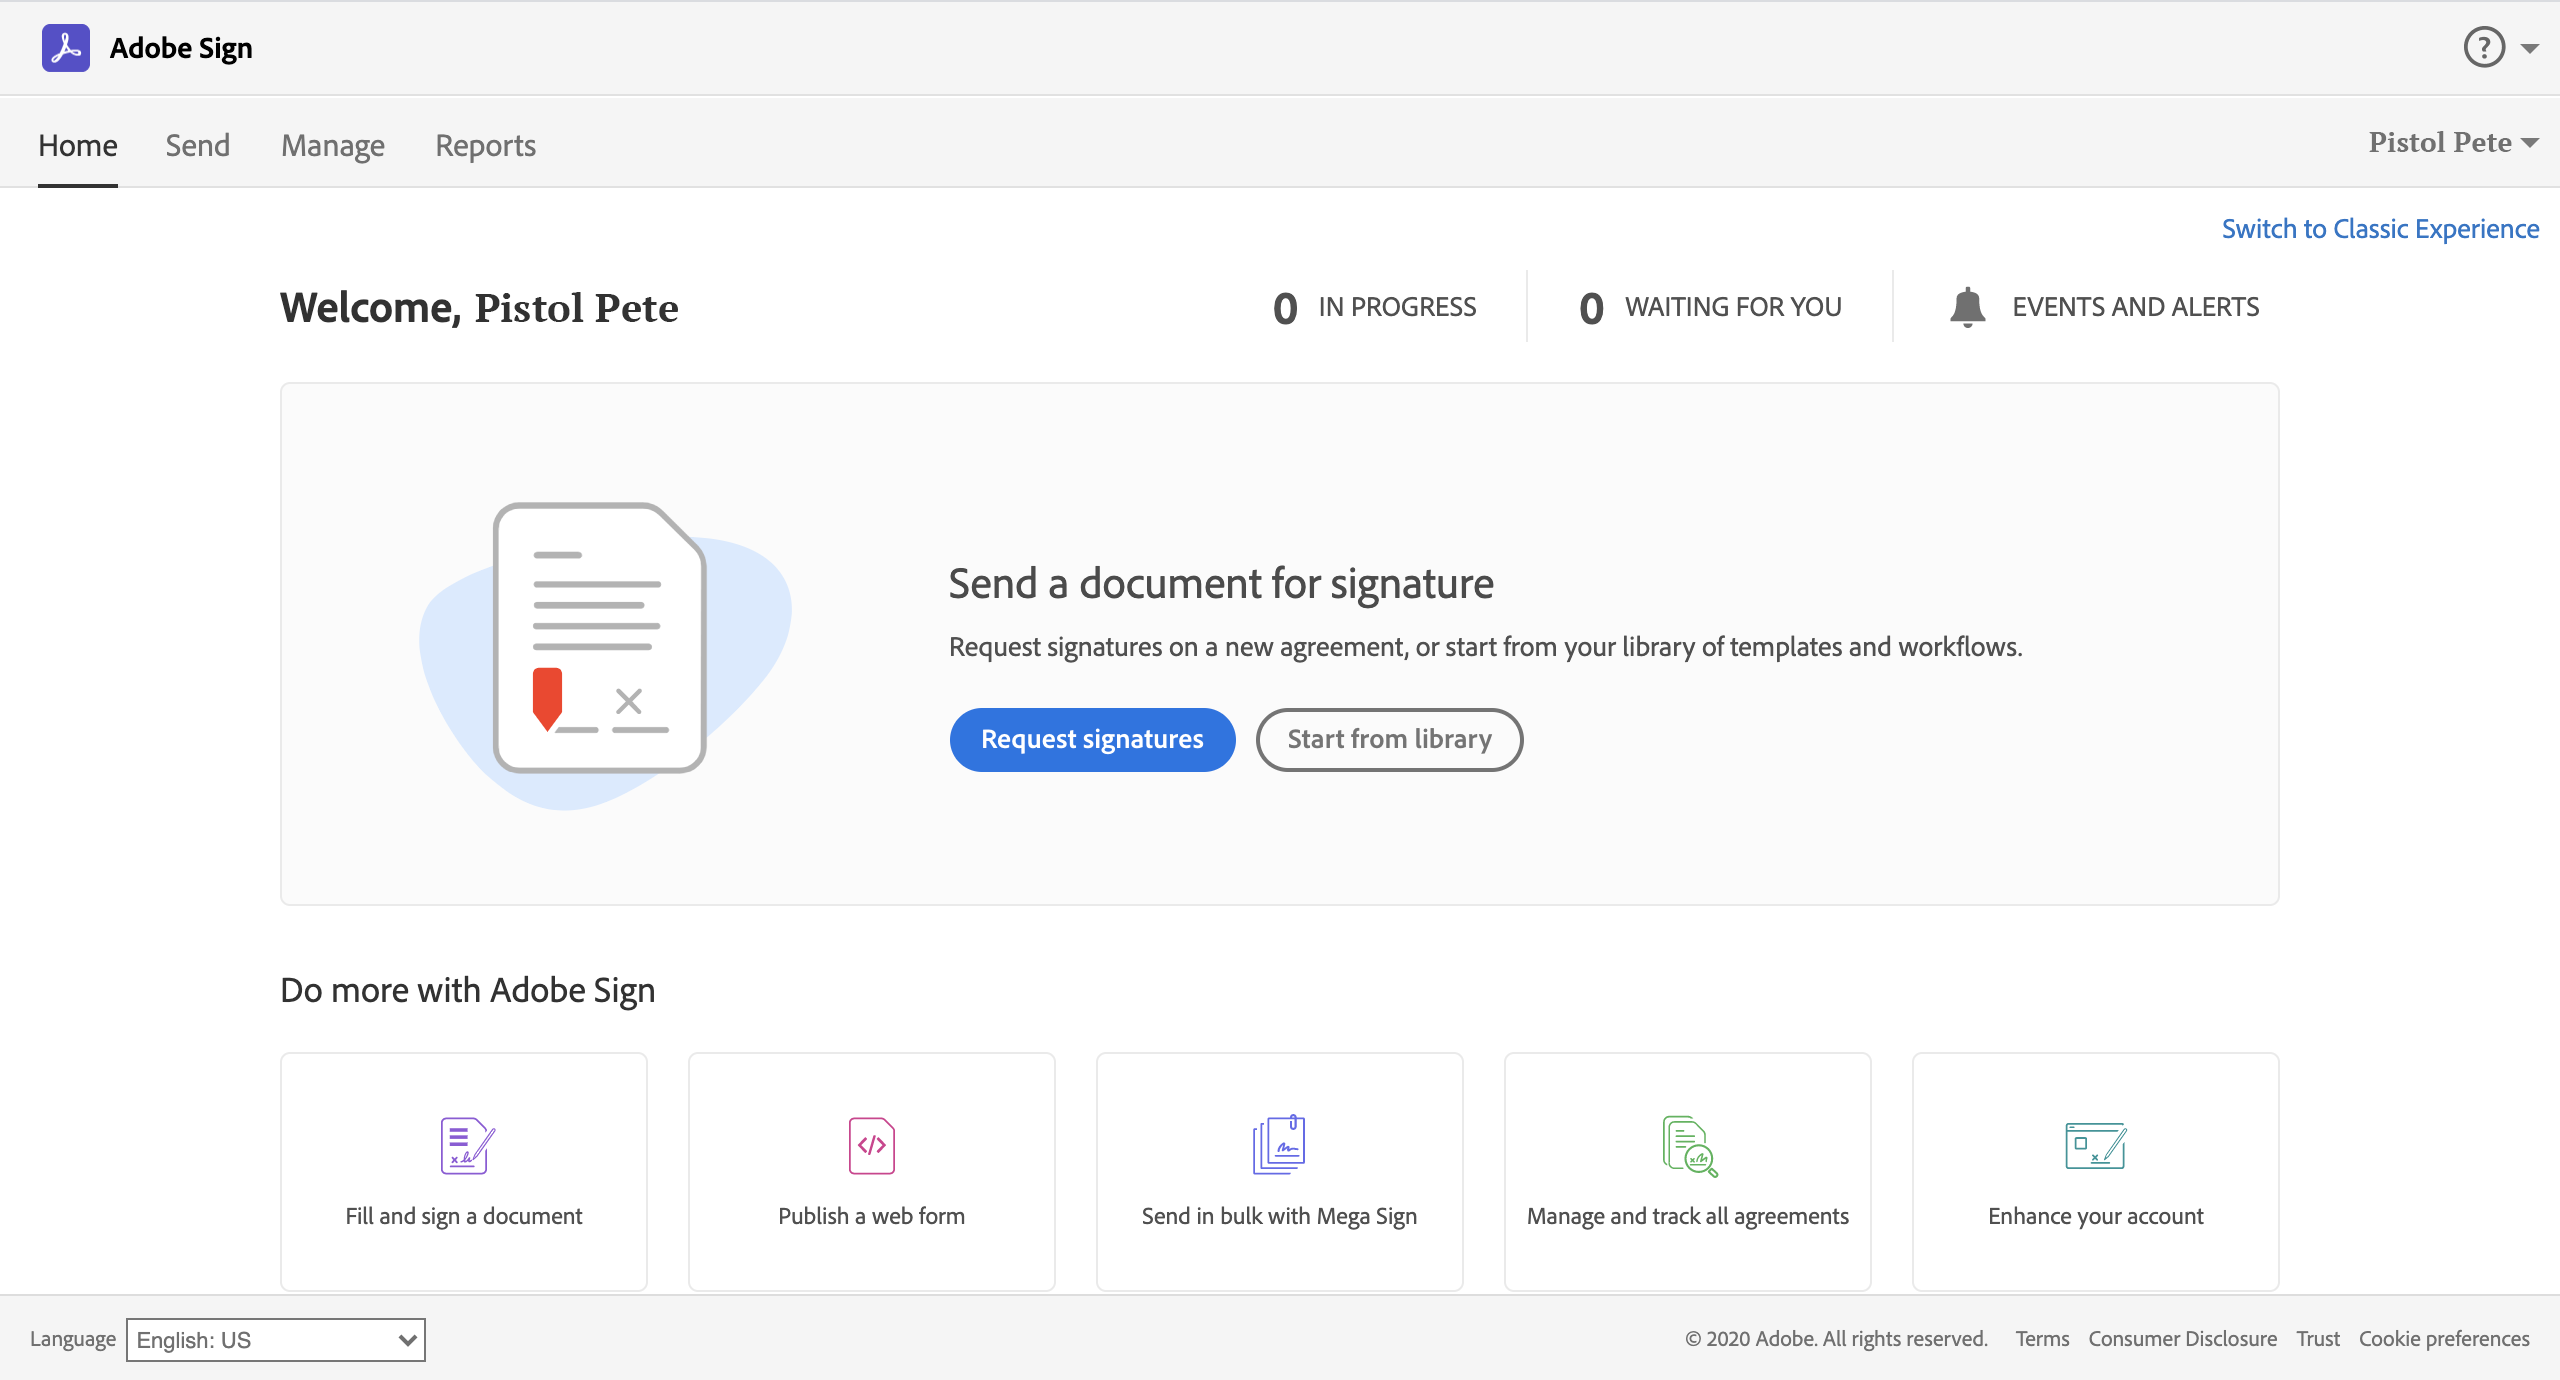
If your screen does not look like the one above, you are in the Adobe Sign Classic Experience. Below are instructions on how to switch to the New Experience or how to submit a workflow using the Classic Experience.
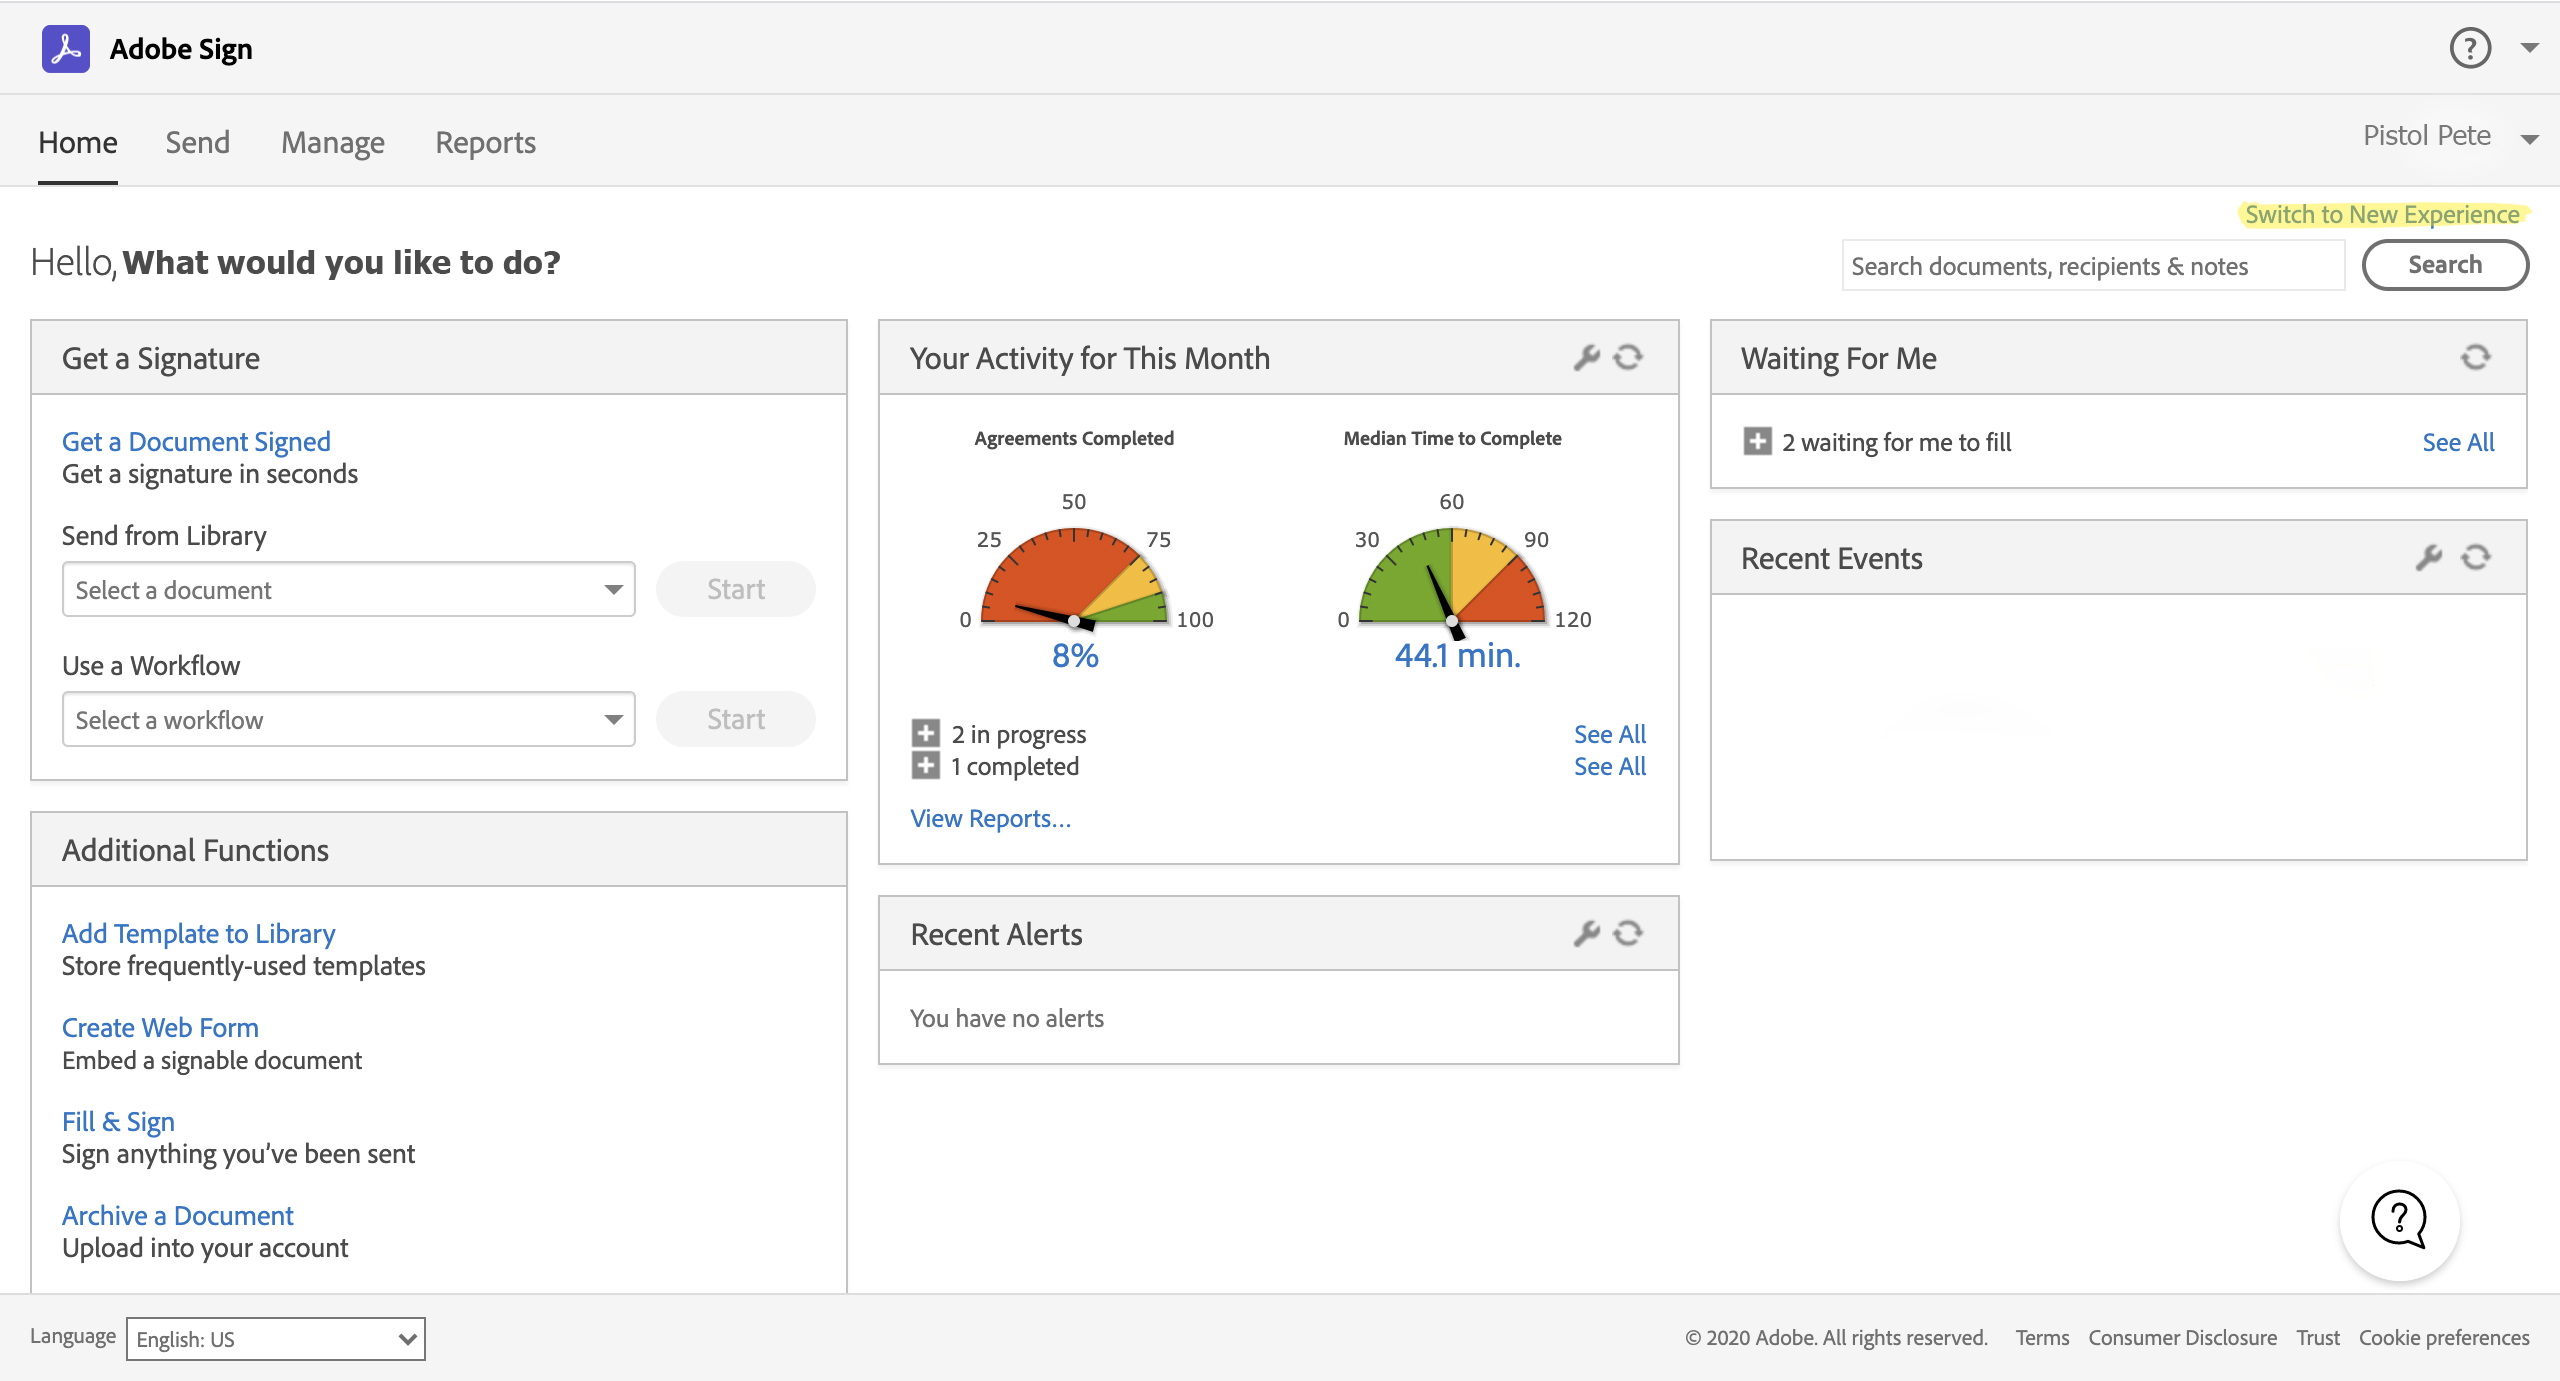
Switching to the New Experience
Users can switch which Adobe Sign experience they are using by utilizing the switch experience option under their name in the top-right corner.
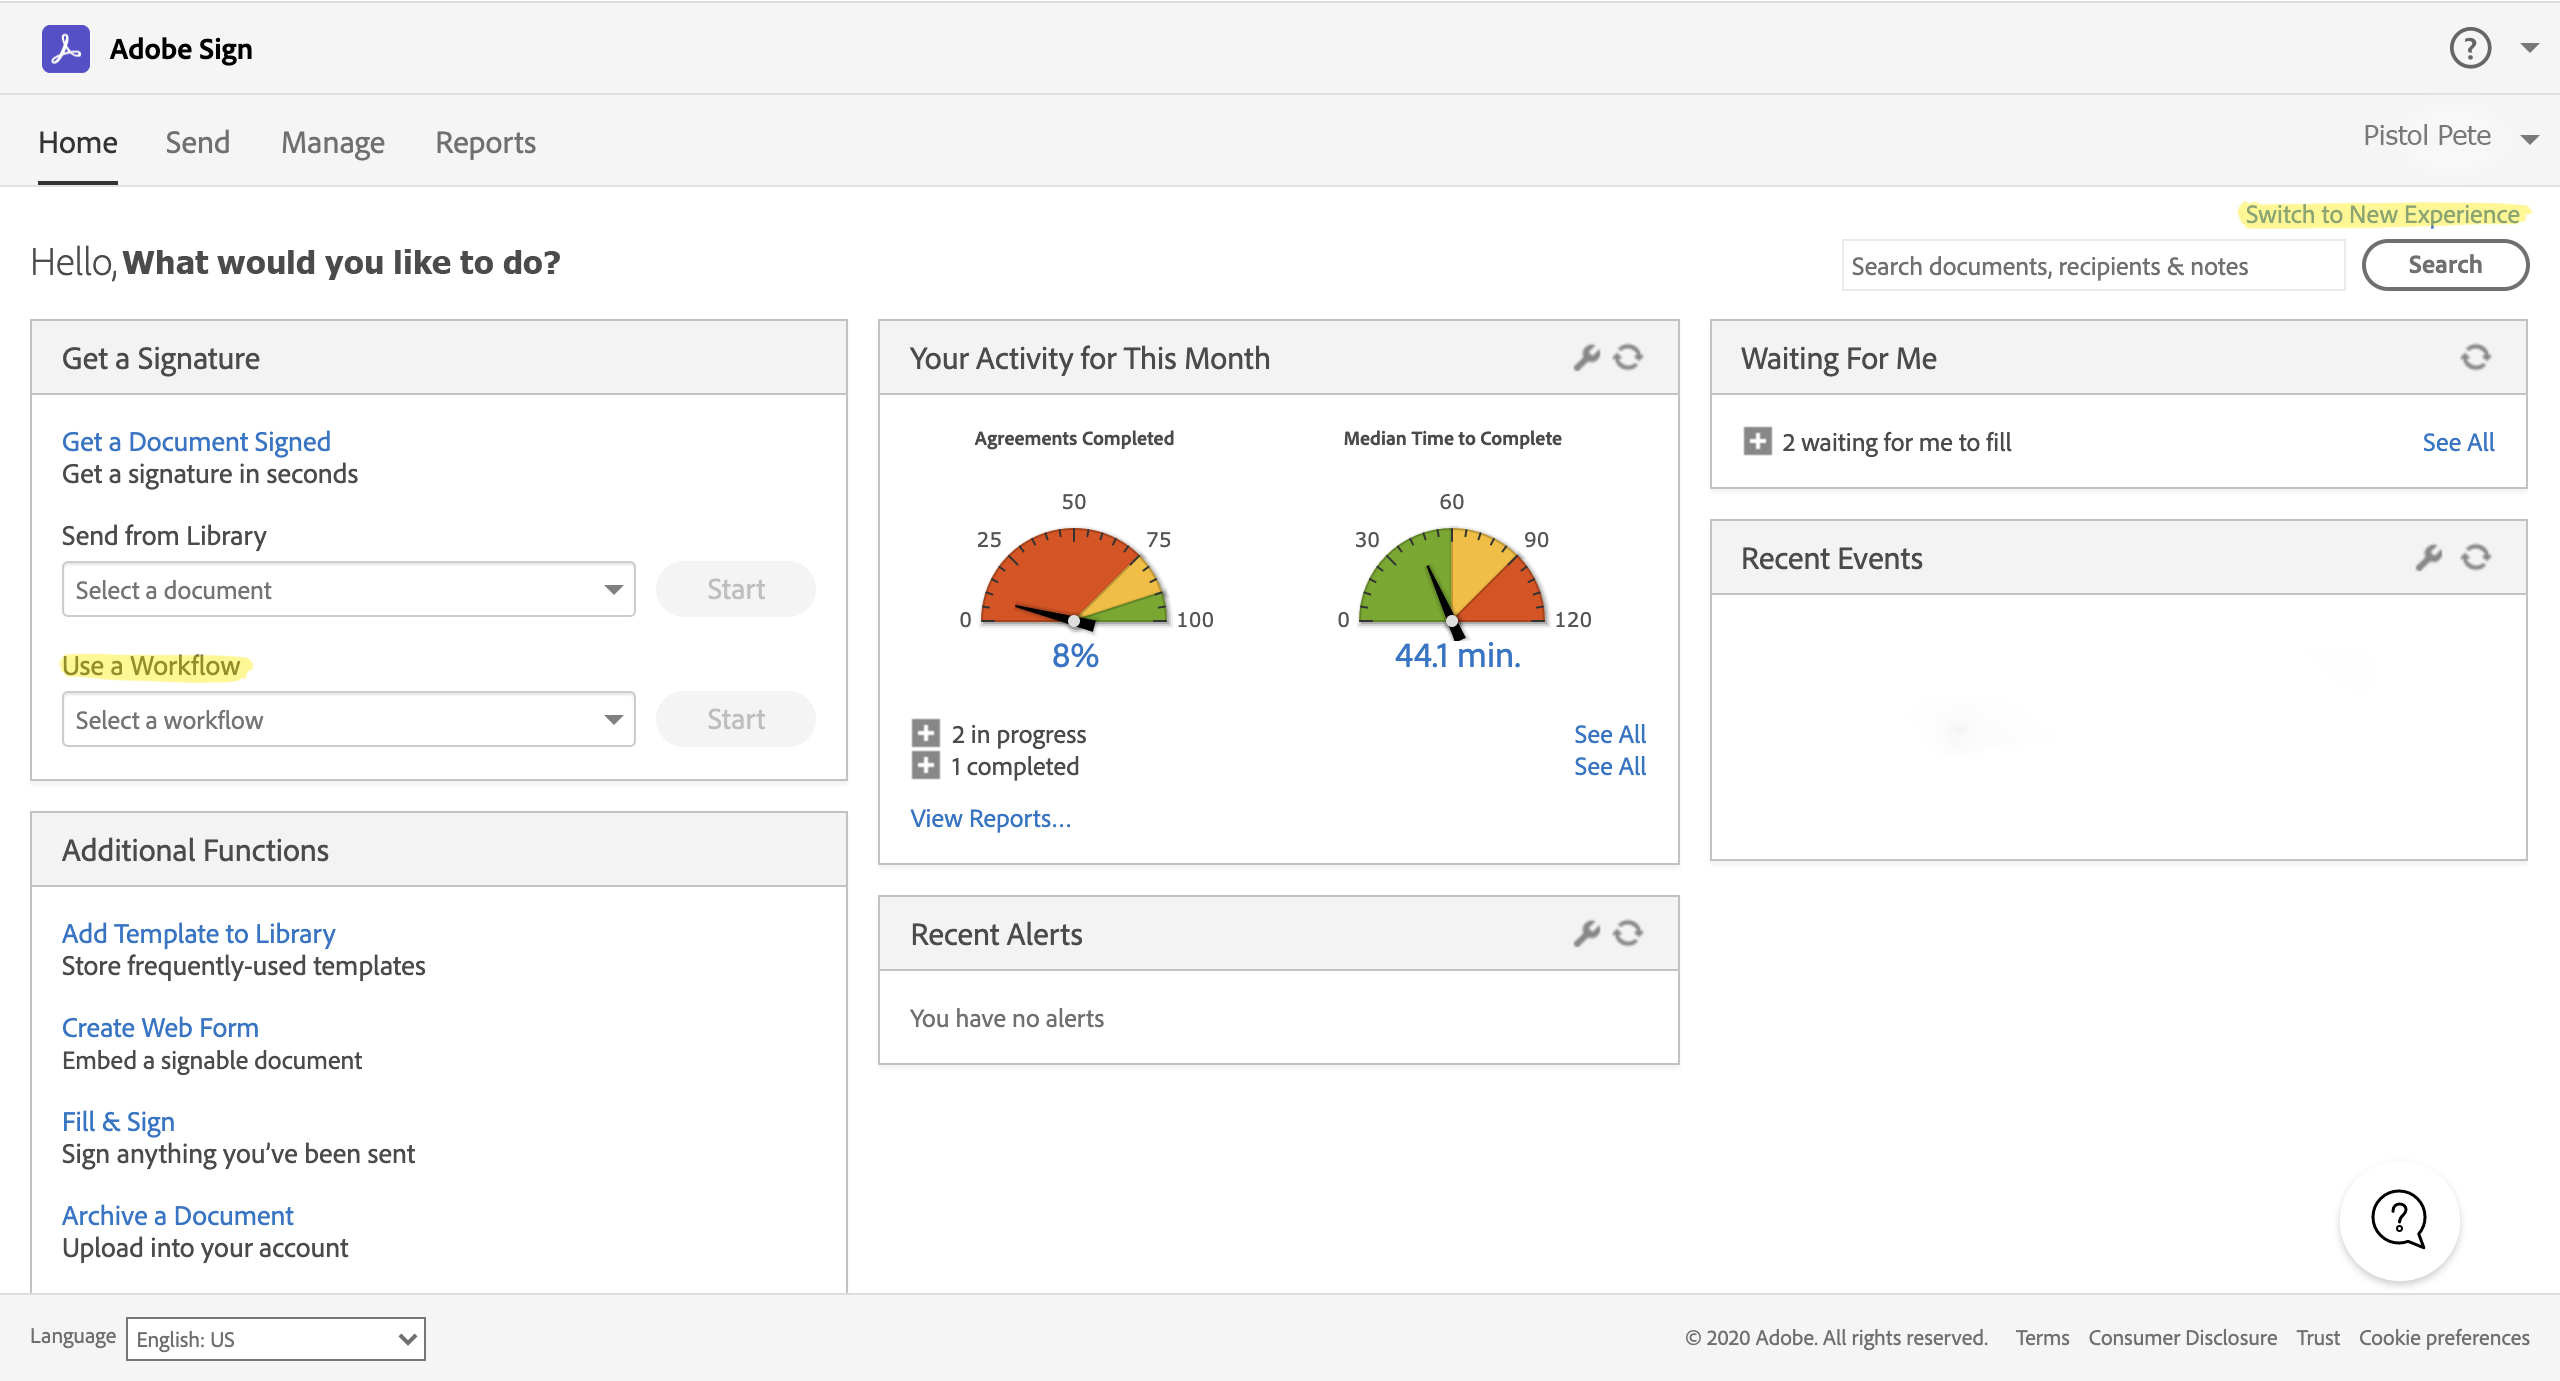
Submitting a Workflow Using the Classic Experience
A workflow can be submitted using the Classic Experience by selecting the appropriate workflow in the drop-down menu titled "Use a Workflow" located in the "Get a signature" panel.
3. Select the Appropriate Workflow
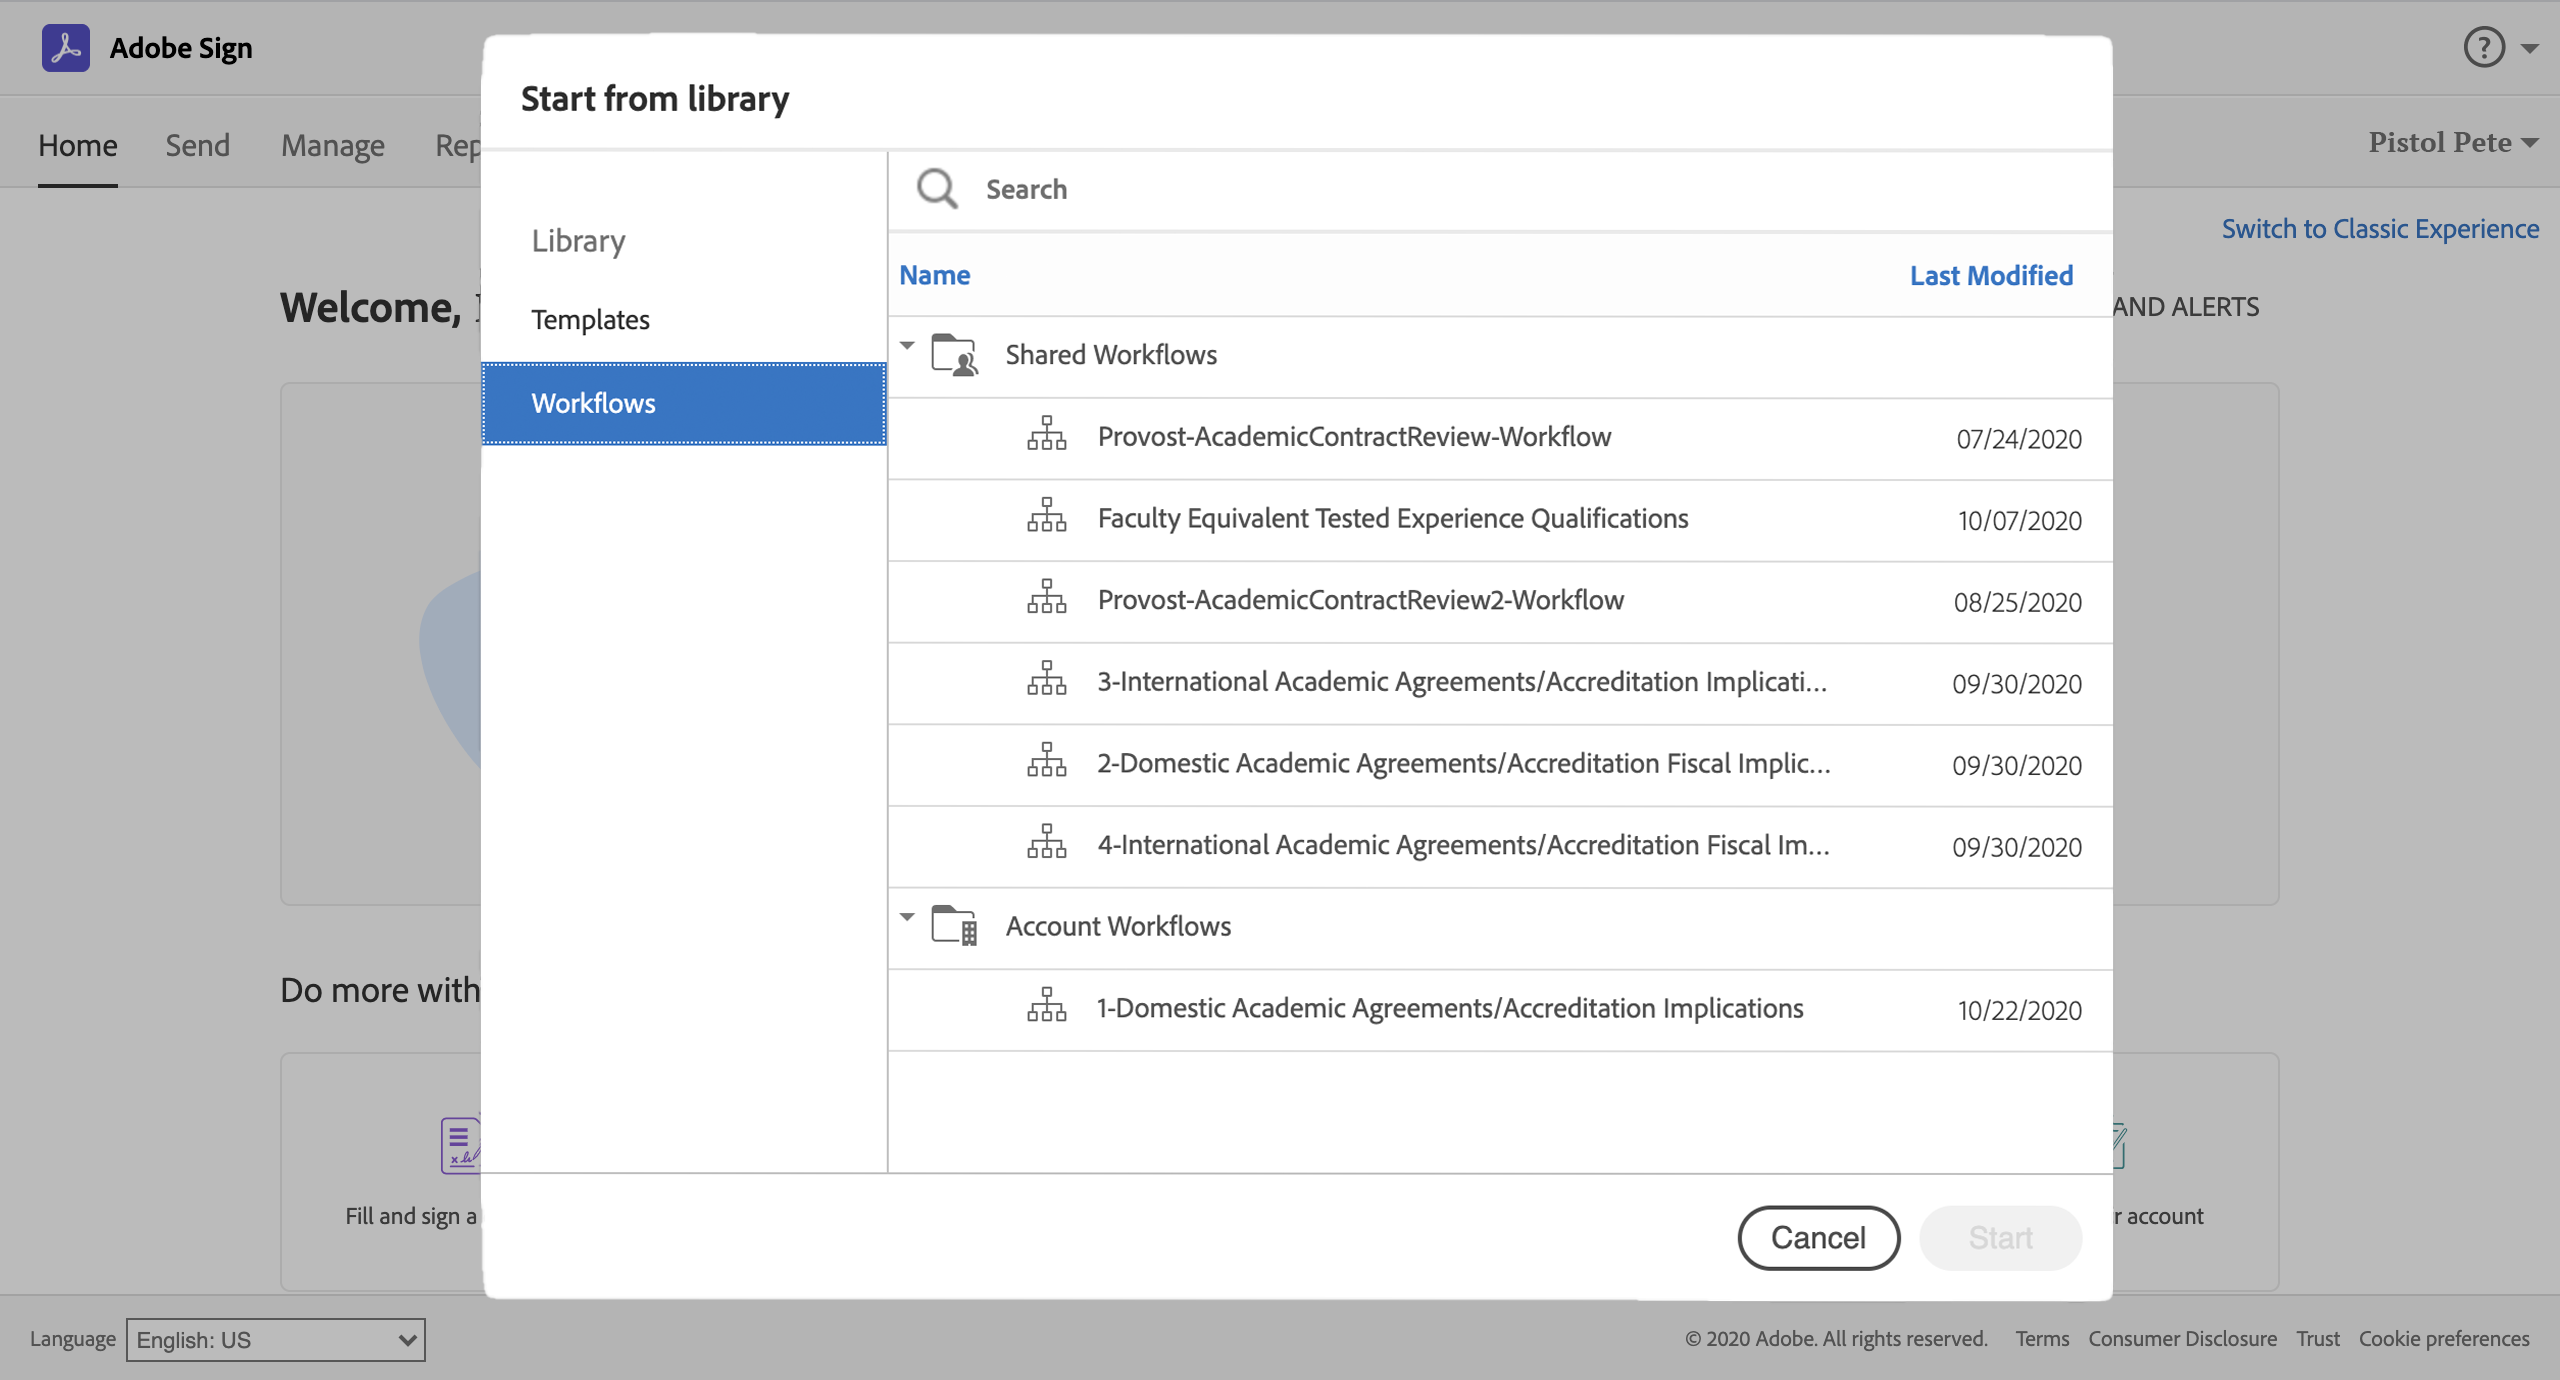
On the left side of the pop-up window, select "Workflows." A list of workflows will appear to the right. Select "Faculty Equivalent Tested Experience Qualifications" from the list of Shared Workflows.
Workflows are identified by the following symbol: 
4. Fill in Workflow Information
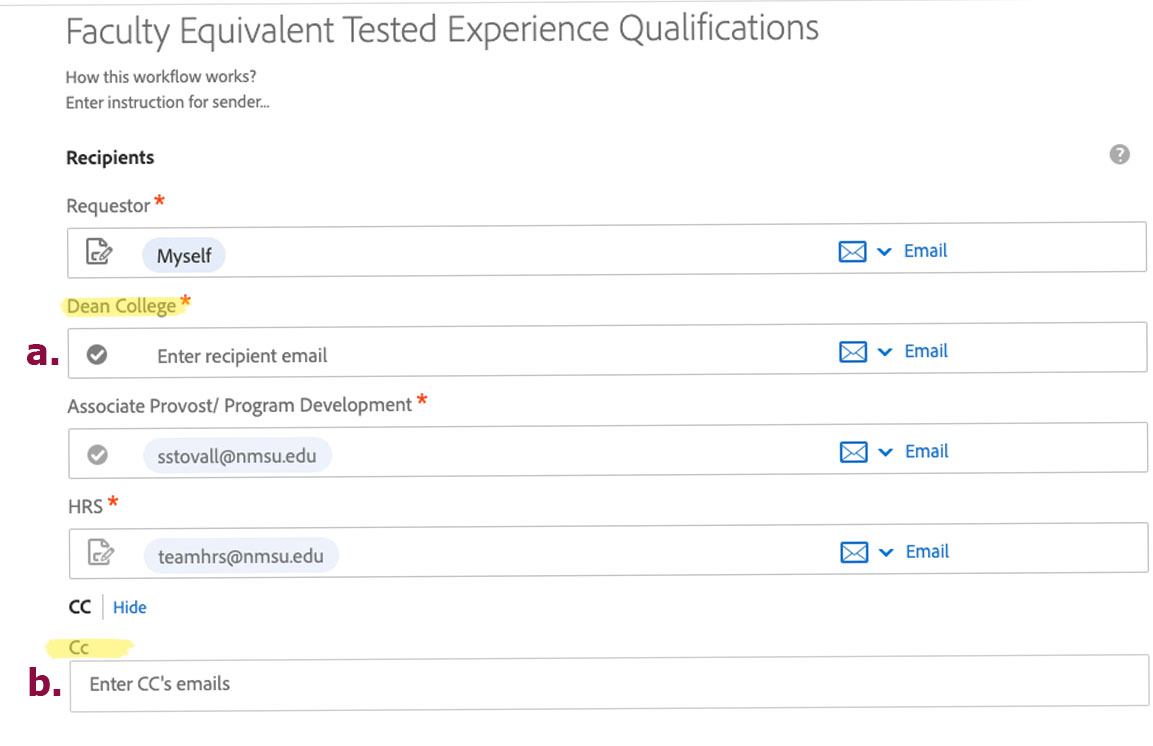
- Type in the email for the appropriate Dean or College.
- Optional: Add a CC email. The routing information will be sent to this individual as well.
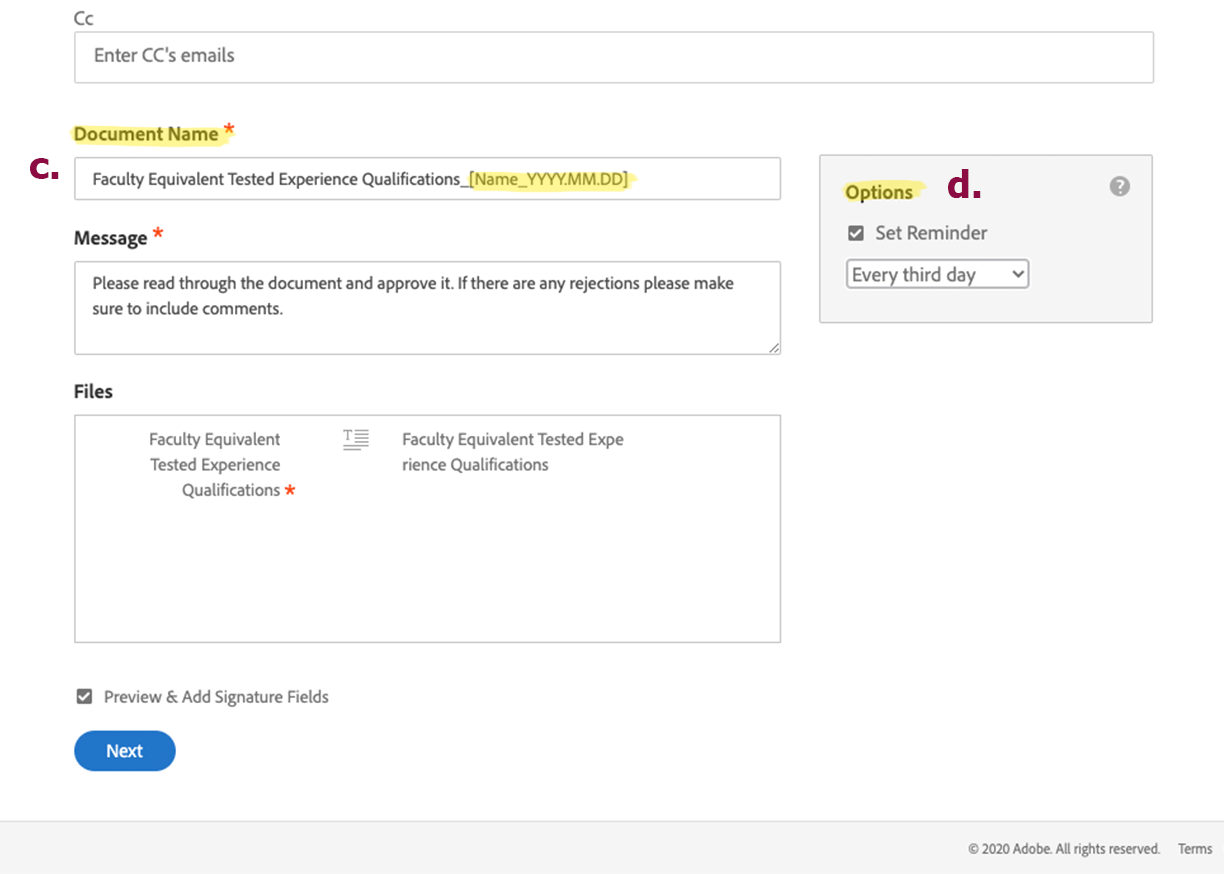
- Update the Document Name to include the name of the individual who is being considered for Equivalent Tested Experience and the date you are submitting the request for approval. Example: Faculty Equivalent Tested Experience_JohnDoe_2020.12.15.
- Optional: Set a reminder. If you would like to send a reminder email, select "Every Third Day." This will send a reminder email to the approvers if needed.
Once these areas are complete, press "Next" to open a preview of the form.
5. Review Form — Select "Fill, then Send"
After pressing "Next," the form will be submitted to the queue to be filled. You may receive an email saying "Your Agreement Has Been Sent for Approval." This email serves as notification that the workflow has been submitted and is waiting for the first approver, the initiator, to complete and submit the form.
Select "Fill, then Send" located in the bottom-right corner of the screen (blue button).
6. Fill Out Form and Upload Documents
Fill out the form and attach required files as indicated on the form for the candidate/employee. These files will be attached at the end of the form and viewable by all approvers as well as anyone you identified to be copied in Step 4.
Selecting the Correct Instruction Level Code & Course Prefix(es)
You must indicate the scope of teaching (level and course prefix(es)) applicable for an instructor who is qualifying under the equivalent tested experience option. Once approved, the scope will be documented on the personnel file and coded in Banner.
You will be required to submit a recommended scope using a coding system as described below, based on the instructor's qualifications in the hiring field.
The "Level of Instruction" for which you are seeking approval should be selected based on the highest level of instruction for which the candidate/employee is qualified to teach in the hiring field (for additional details, see ARP 6.50). You will have four options:
- To teach lower division undergraduate courses only, select UGLL.
- To teach any level of undergraduate courses, select UGUL.
- To teach master's degree level courses and below, select MAST.
- To teach doctoral level courses and below, select DOCT.
The course prefixes should be determined by the field in which the instructor is deemed qualified to teach based on equivalent tested experience.
You may include multiple course prefixes as appropriate, but only those that are within the purview of the hiring department. Examples might include MATH, STAT, NURS, etc.
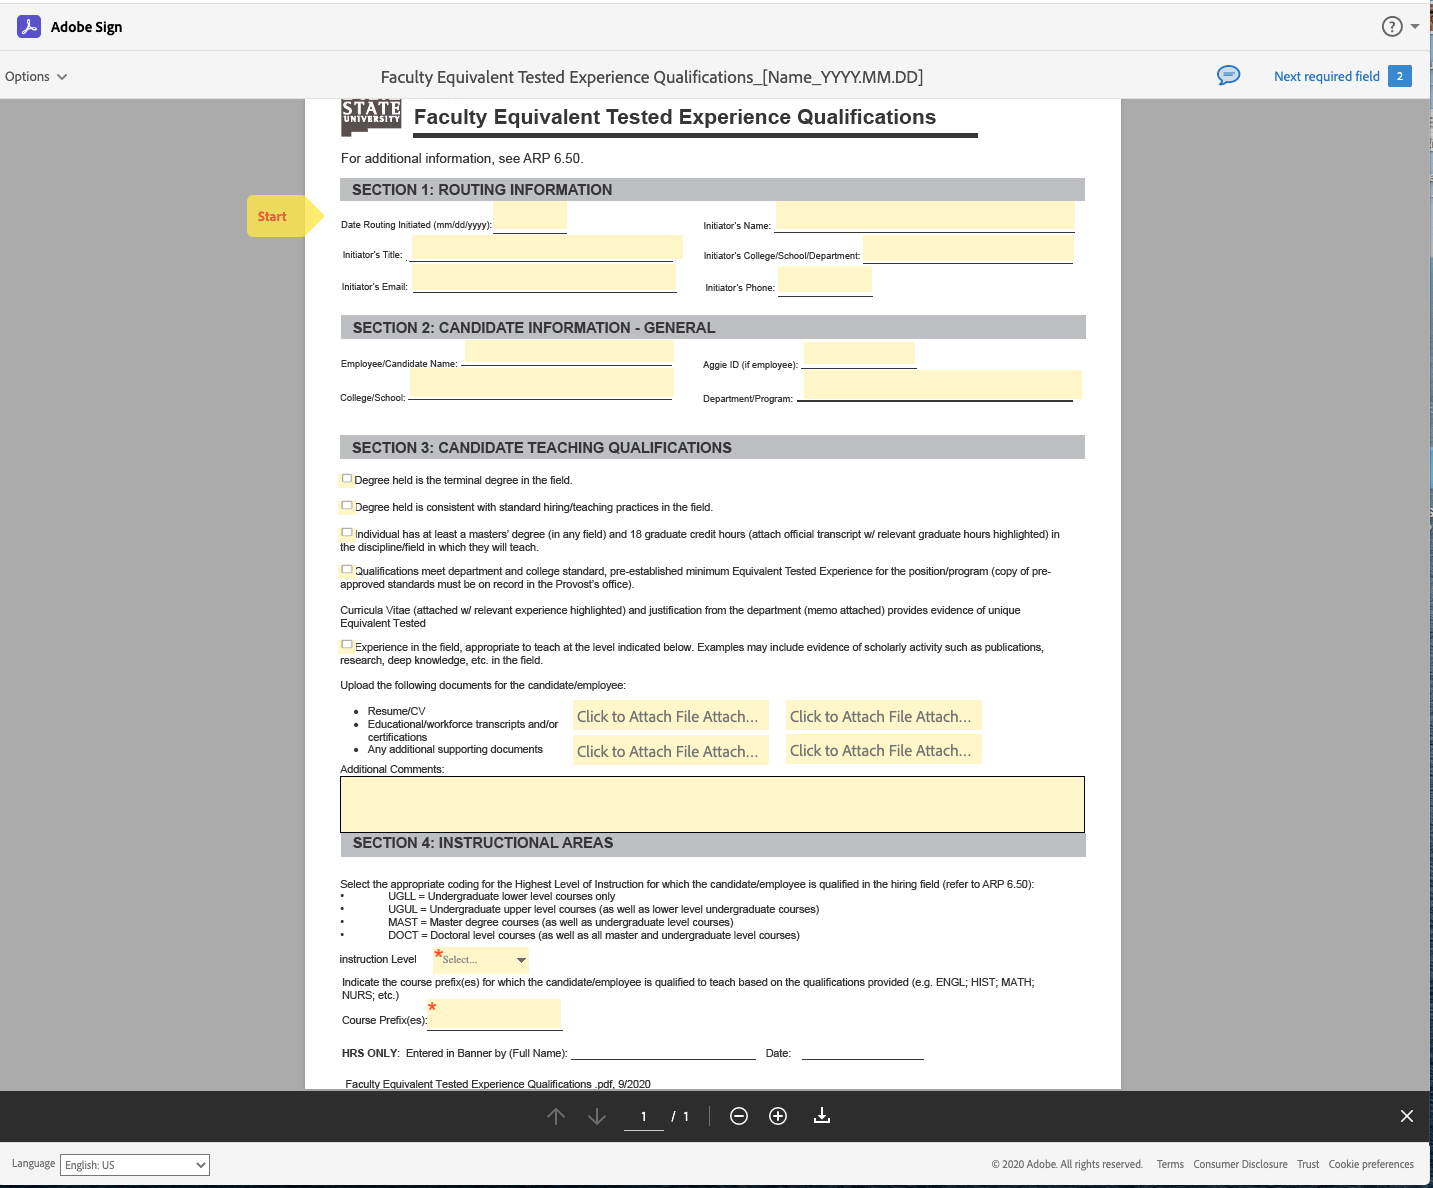
Note: There are only areas for four file uploads. If you need to upload more than four files, combine your documents into one PDF. Learn how to combine documents .
After completing the form, a "Submit" button will appear in the bottom portion of the page. Press "Submit" to complete the Initiator's role in the workflow and to pass it on for approval.
7. Routing
The form will now be routed to the Dean/College, Associate Provost for Program Review and Accreditation, and HRS. HRS confirms the approved action and instructional scope have been coded in Banner and the documentation has been placed into the employee file.
8. Completion of Workflow
When the workflow is complete, every person in the workflow will receive a final copy of the form. The form will also remain in Adobe Sign for future access.
What Happens if a Request Is Returned or Declined?
If your request is returned/not approved at any step in the workflow, you will be notified, including a message as to why the request was declined for approval, and the workflow will be canceled.
If you were instructed to make changes to the request, submission form, or provide additional documentation, you will need to restart the approval process with a new submission.
How to Approve a Workflow
1. Open the Adobe Sign Approval Email
An email will be sent from Adobe Sign (echosign@echosign.com) notifying the approver.
The subject of the email will read: "Approval Requested on Faculty Equivalent Tested Experience Qualifications - [Name_YYYY.MM.DD]"
Select "Review and Approve" in the email.
2. Approve or Decline to Approve
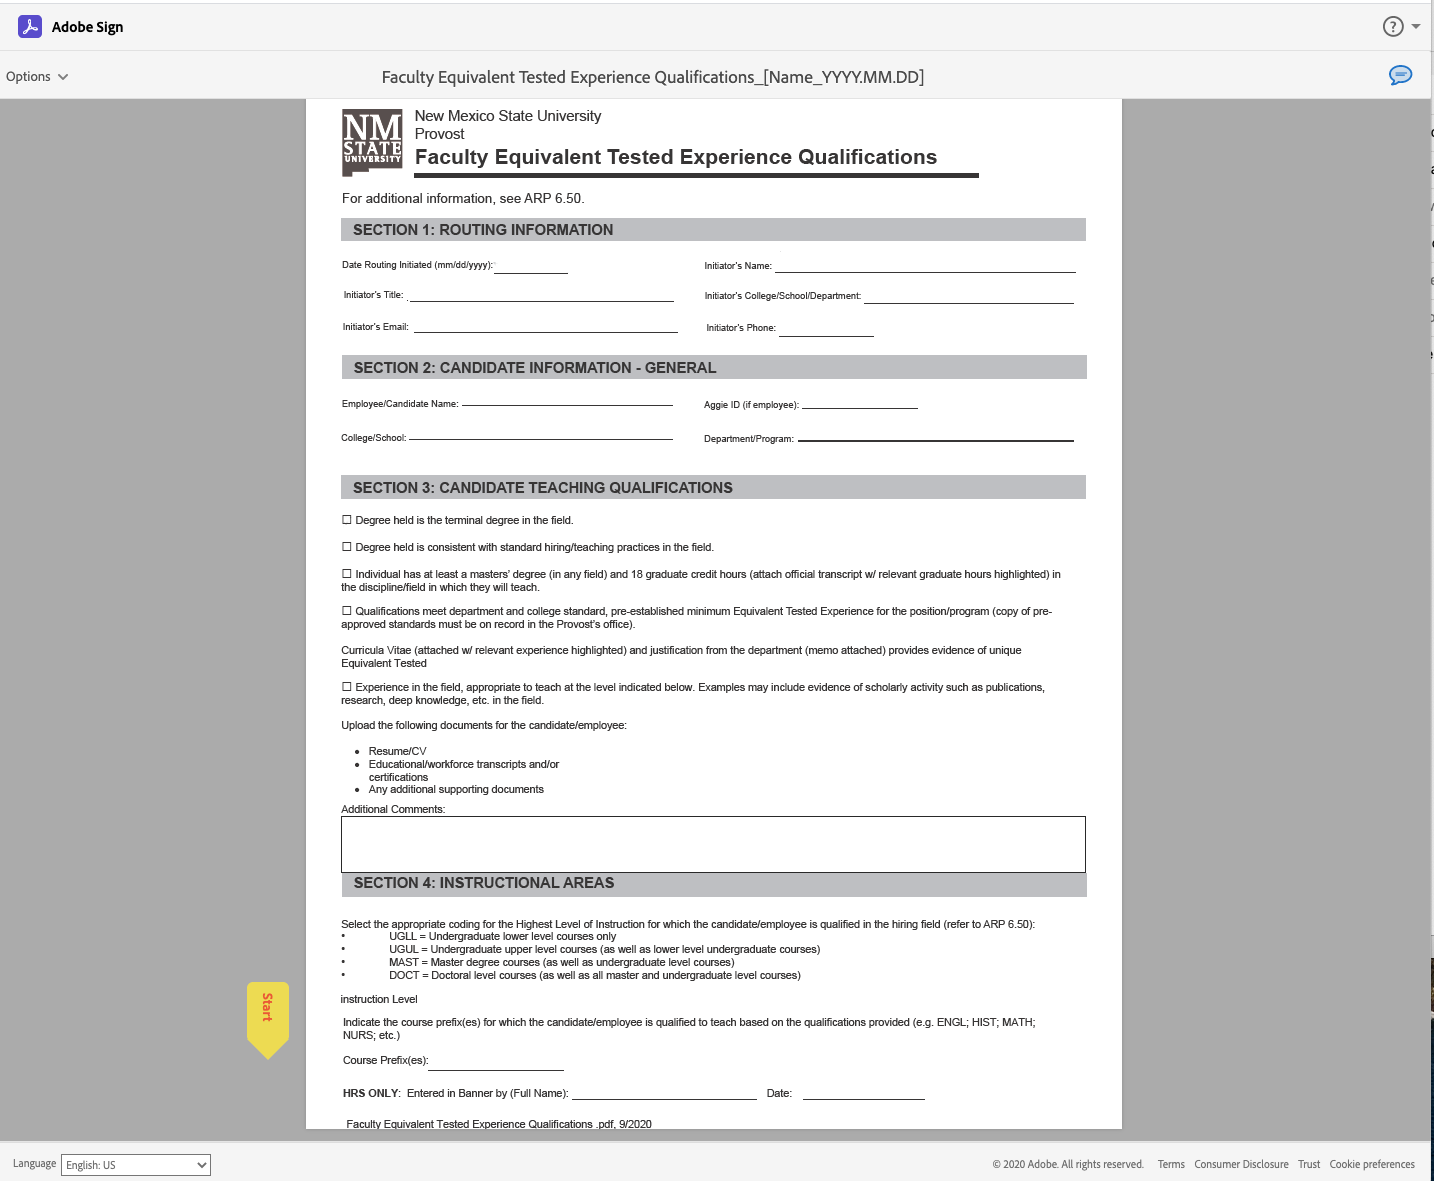
Select the yellow "Start" tab located at the bottom of the page.
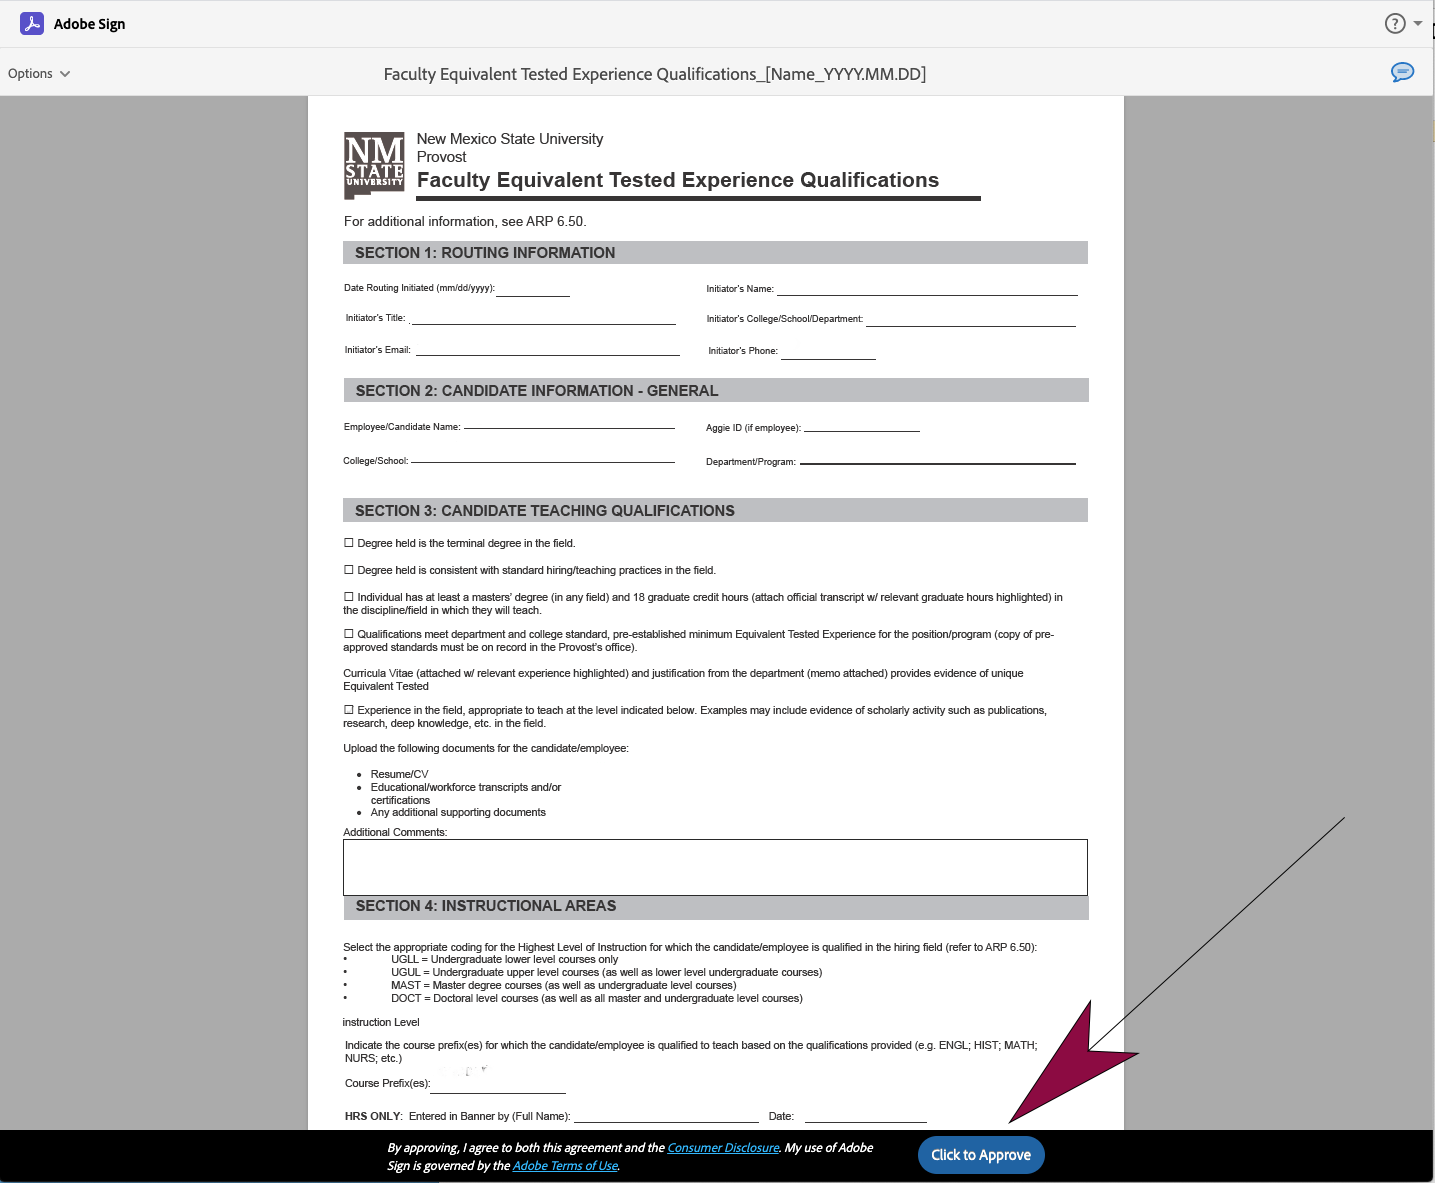
To Approve
Select "Click to Approve." The form will be routed to the next approver.
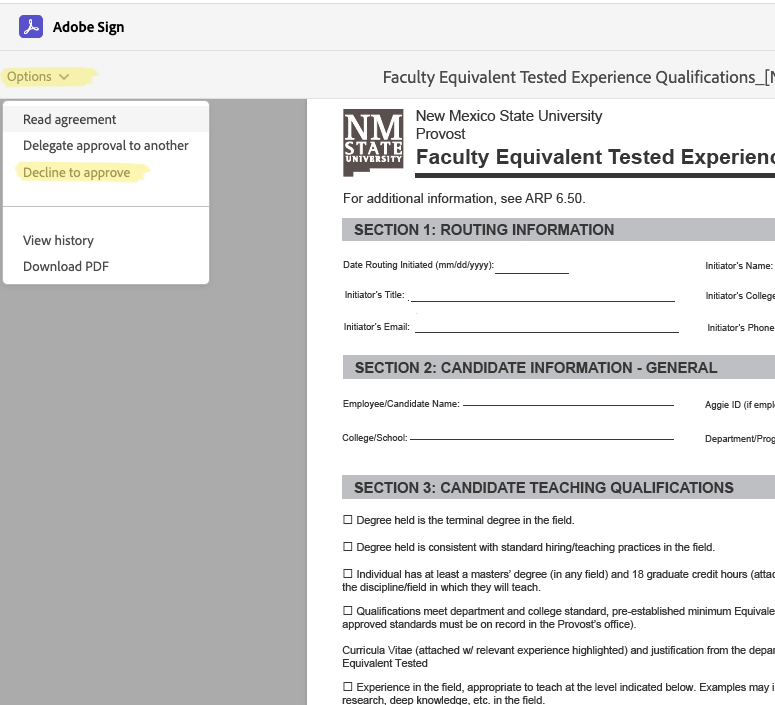
To Decline Approval
Select the "Options" menu in the top-left corner and select "Decline to Approve." This will prompt a pop-up to enter comments explaining why the form is not being approved.
The form will then be sent back to the originator and any other approvers who have signed, notifying them that the form has been declined.
The workflow will need to be restarted to submit the form for approval.
3. Final Copy
When each individual in the workflow has approved, a final copy will be sent to each person involved in the workflow and will include a Detailed Audit Report.
How to Manage Workflows
Individuals can manage their workflows and documents in Adobe Sign through the "Manage" tab located in the top-left corner under the Adobe Sign logo.
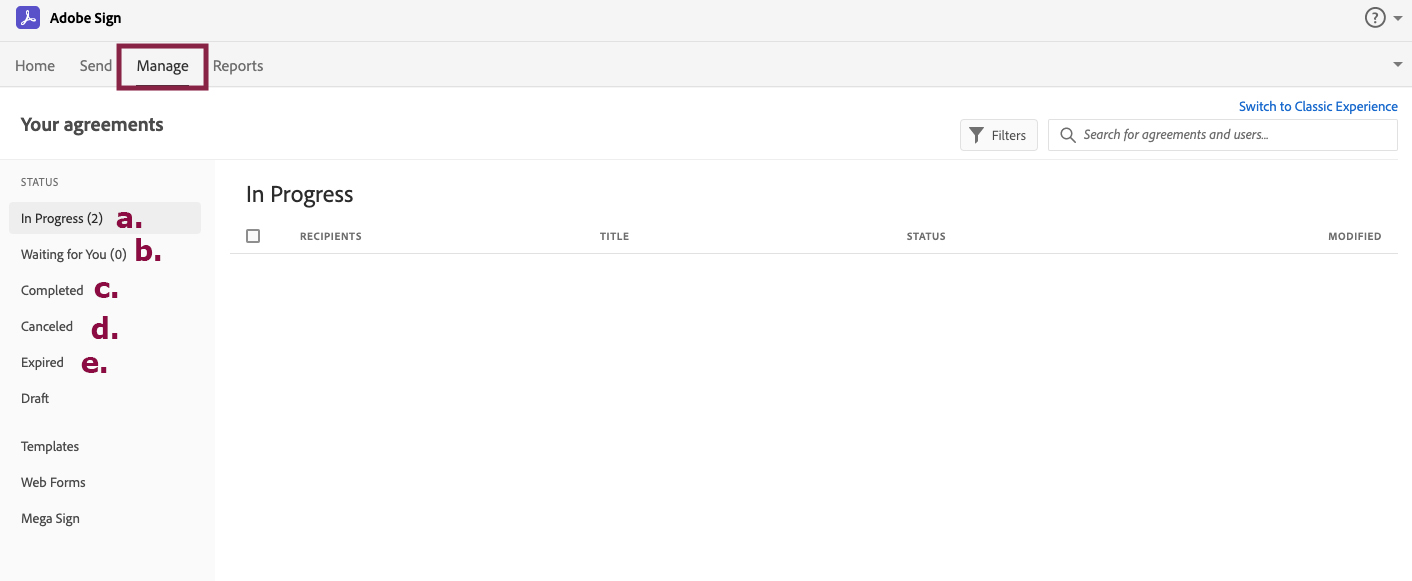
In Progress
Documents and workflows that you initiated for approval will be located here. The approval process can be canceled here.
Waiting for You
Documents/agreements that need your approval or signature can be found here.
Completed
All documents/agreements that have completed the approval and signature process can be found here in their final form.
Canceled
Approvals that have been canceled either by the initiator or someone in the approval process can be found here.
Expired
At this time, the Academic Agreement workflow will not allow for approvals to expire.
How to Cancel a Workflow
If the initiator needs to cancel the workflow, follow the steps below after logging into Adobe Sign.
- Go to the "Manage" tab located in the top-left corner under the Adobe Sign logo. See the image in the Manage Workflows section above.
- In the "Status" menu located on the left side of the screen, select "In Progress."
- Select the workflow/document that needs to be canceled.
- A menu will appear on the right side of the screen with options regarding the selected workflow. This includes a cancel button.
When a workflow is canceled, the user is given options to notify every person in the workflow, as well as add comments explaining why it is being canceled.
After it is canceled, the workflow and documents will be moved to the "Canceled" section of the left menu.